Ok, I am a big fan of WordPress’s plugins more than osCommerce’s addons. So it is natural that I would look for a WordPress slider to use in osCommerce before installing one of osCommerce’s addons. Well, that’s because I had done both and I tend to go with the path of less resistance. Perhaps that was the path of less resistance to me as I can code a little so it was easier to hack than had to show our creative folks on how to create or update a nifty animated slide. Here I am going to show you how I had hacked Smart Slider 2 for WordPress into an OSC demo store that I am creating. I am also going to assume that you had integrated WordPress into OSC. I must say the result had turned out great. There was definitely a learning curve on figuring out how to use the slider’s admin inteface, but once that’s done you can for sure update your OSC front page with ease.

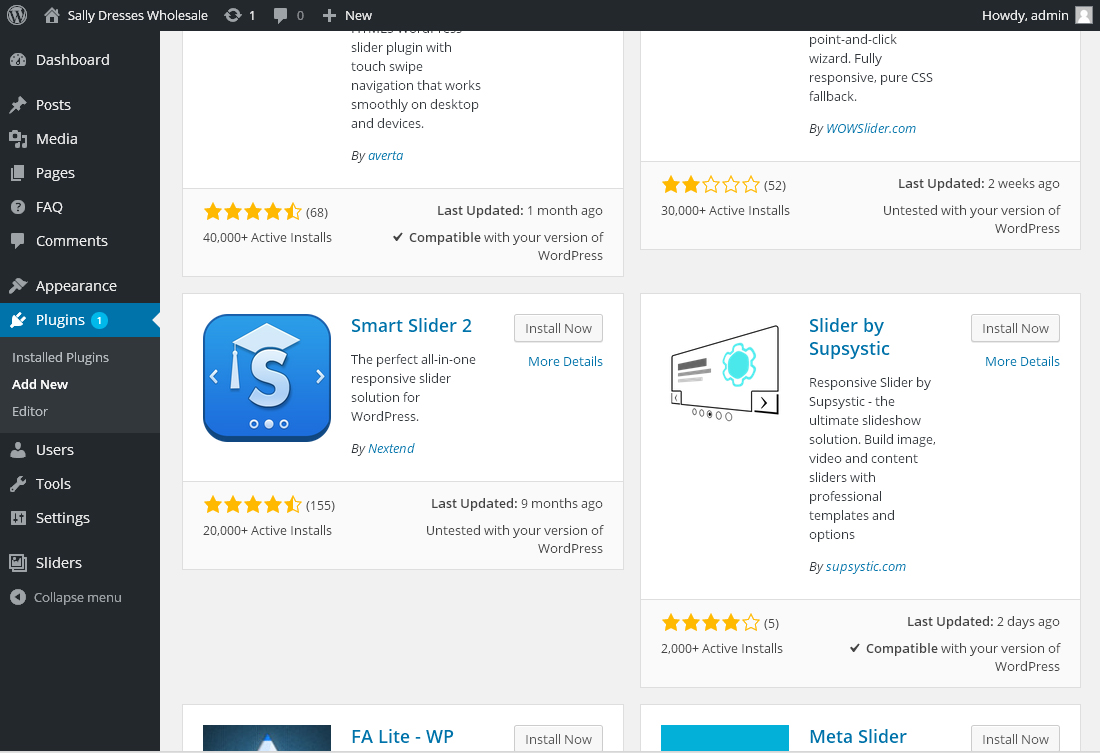
- Ok, here we go, and as always go to your WordPress Plugins, and I did a search using the keyword “slider” to look for a slider plugin that I could use. I had never heard of Smart Slider 2 before, but that’s what I had decided to go with after checking out their demo site. Also, you are seeing the full version of Smart Slider here as after testing the demo version I had decided to pay that $19 bucks and really gave it a “test drive.” Yes, click install now and activate and it’s done.

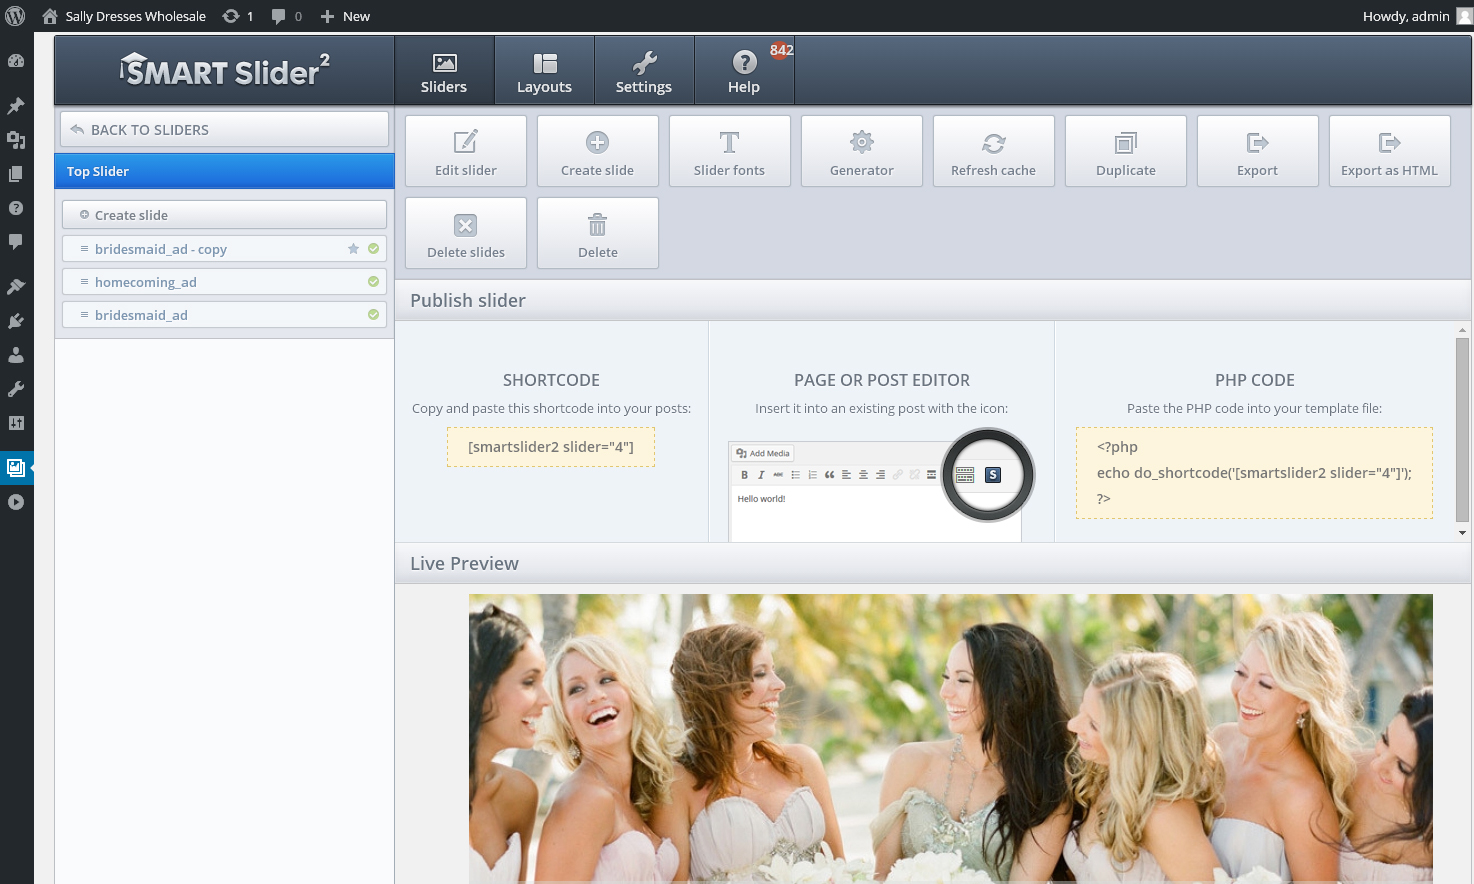
- Great, go the the Sliders tab and begin creating your first slider. You should definitely go to their online documentation site when you are stuck. The live preview and the ability to preview the slides in difference responsive modes was nice!

Create you first test slider using Smart Slider’s admin interface - It may be easier to just import one of their sample sliders to modify it as your own. The import sample slider is a convenience feature.

- Now let’s get the slider you had created integrated into OSC. Get the slider number in the shortcode from step 2 above, and use it to prepare the slider number in the block of codes below (look inside the do_shortcode() function). In this example I was adding two sliders into the front page; hence, the double do_shortcode() function call. Let’s finish this step by adding this block of codes right before the closing </head> tag in your template_top.php file.
<?php //Wordpress Environment... require('contents/wp-load.php'); $smartslider2_frontpage = do_shortcode('[smartslider2 slider="4"]') . '' . do_shortcode('[smartslider2 slider="23"]'); do_action('nextend_css'); $css = NextendCss::getInstance(); $smartslider2_css = '<script type="text/javascript"> (function (w, d, u) { if(w.njQuery === u){ w.bindNextendQ = []; function pushToReady(x) { w.bindNextendQ.push([alias.handler,"ready", x]); } function pushToLoad(x) { w.bindNextendQ.push([alias.handler,"load", x]); } var alias = { handler: w, ready: pushToReady, load: pushToLoad } w.njQuery = function (handler) { alias.handler = handler; return alias; } } })(window, document); </script>'; echo $css->generateCSS(); echo $smartslider2_css; ?> - Next, add the below block of codes just before the closing </body> tag in template_bottom.php file. So, in step 4 and 5 we had basically set up the slider and asked OSC to output the necessary CSS links and Javascript codes in the header and footer to run the sliders. Typically speaking, you should be able to output the required header CSS and footer JS for WordPress by calling the wp_header() and wp_footer() functions. I tried that first but it didn’t work in this case so I had to go through Smart Slider’s codes and “re-render” them just as they did.
<?php
 //Wordpress SmartSlider2 Footer JS...
 $js = NextendJavascript::getInstance();
 $js->generateJs();
?>
- Last step…it is to add the sliders to our OSC frontpage. It is up to you on where to put the sliders. I did mine by replacing the new products and upcoming products modules in OSC’s index.php file.
 // include(DIR_WS_MODULES . FILENAME_NEW_PRODUCTS);
 // include(DIR_WS_MODULES . FILENAME_UPCOMING_PRODUCTS);

 //Wordpress SmartSlider2 Front Page...

 echo $smartslider2_frontpage;

Done! Ok, one last comment I had on Smart Slider 2 was the showcase slider had a short fall to me because it couldn’t do loop around. The showcase slider had integrate nicely into our full page Bootstrap design, but it was abandoned as I found the rewinding showcase a bit annoying. I had integrated a few WordPress plugins into OSC before and I think I would consider this one as difficult as I had to do a little more code digging to get it to work. However, you are definitely not limited to using Smart Slider 2 though.
Thank for this article!
Can I add second slider?
<?php
//Wordpress Environment…
$smartslider2_frontpage = do_shortcode('[smartslider2 slider="3"]');
$smartslider2_front = do_shortcode(‘[smartslider2 slider=”4″]’);
do_action(‘nextend_css’);
$css = NextendCss::getInstance();
$smartslider2_css = ‘
…
Is that correct?
Yes, you can. I did it like this since they go together…
$smartslider2_frontpage = do_shortcode(‘[smartslider2 slider=”4″]’) . do_shortcode(‘[smartslider2 slider=”23″]’);
I also had mixed and matched…
$smartslider2_frontpage = do_shortcode(‘[smartslider2 slider=”3″ tablet=”3″ phone=”11″]’) . cq_pinterest_shortcode_func(Array(‘id’ => ‘1203’)) . do_shortcode(‘[smartslider2 slider=”8″ tablet=”8″ phone=”10″]’);